
Identifying the Source of Leaks
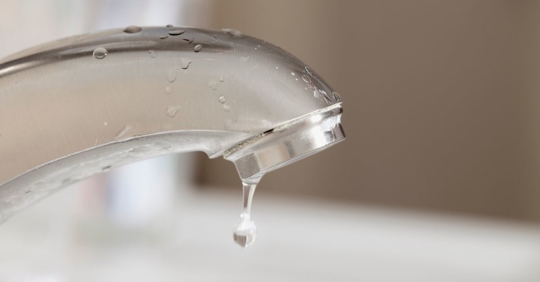
When it comes to leaky faucets, the trickiest part can often be pinpointing where the leak is originating from. A common culprit of persistent dripping can be found in worn-out washers and seals. These components, once damaged or degraded, allow water to escape even when the faucet is turned off. Similarly, O-rings, which sit on the screw tightly fastening the handle, can wear away, leading to leaks at the base of the faucet. Additionally, loose or misaligned faucet parts, such as handles or spouts, can mean leaks are lurking. As a sacrament to DIY enthusiasts, knowing the right tools and techniques for identifying these issues is essential. Start with a flashlight and a keen eye to detect moisture or water drips. Check beneath the sink and around the faucet for any damp areas—these might lead you directly to your problem.
Once you've located potential leak sources, a basic toolset becomes indispensable. Wrenches, screwdrivers, and pliers are crucial for tightening loose parts or replacing broken components. At times, food dye might be required to track down elusive leaks—simply put a few drops into the waterline and see where it emerges. Using these techniques allows enthusiasts to identify root problems without major intrusion or expense. With each drip addressed, you're not only conserving water but also keeping those pesky water bills in check!
Step-by-Step Repair Guide
Fixing a leaky faucet often requires a dose of patience and a streamlined approach. Compression faucets, for instance, are notorious for leaks due to their movable parts. These faucets employ washers that seal the water flow when tightened and open when loosened. However, over time, these washers degrade or shift. To repair a compression faucet, firstly ensure the water supply is turned off. Disassemble the faucet handle to access the washer, and if worn, replace it with a compatible new one. On the other hand, ball faucets, known for their single-hand operation, might develop leaks due to worn seals or springs. Repairing a ball faucet might require a faucet repair kit, as internal components can vary depending on the model. The focus, however, remains on reassembling cleaned, new parts in the order they were disassembled, ensuring a smooth operation post-repair.
Having prepared all necessary tools like adjustable wrenches, a complete screwdriver kit, and appropriate replacement parts before beginning any repair saves time and effort. Detailed guides and instructional videos can assist in demystifying the repair process further. While the task might appear daunting initially, the satisfaction of repairing a leaky faucet independently is a reward in itself. Moreover, staying proactive in maintenance—like periodically assessing faucet functionality—goes a long way in preventing surprise leaks and damages. Plus, you'll become the go-to faucet expert before you know it!
Preventative Measures to Avoid Future Leaks
Prevention, as they say, is better than cure—especially when it comes to minimizing faucet leaks in the future. Regular maintenance is your best ally. It involves checking your faucet's water pressure; excessively high pressure can strain deposit builds and reagents, promoting leaks. Another practical routine would be replacing seals and washers every six months, even when no signs of leaks are evident. This diminutive habit set can help avoid situations where a minor wear-and-tear escalates into a costly problem. Importantly, be on the lookout for hard water residue. Hard water, notorious for leaving behind mineral deposits, can impair faucet efficiency over time.
Mitigating hard water effects might require the installation of a water softener system, which is an investment gearing towards the long-term health of your faucets and home plumbing. Besides, maintaining a habit of drying the faucet's aerators, thereby preventing water-related degradation, enhances its lifespan.
Common Causes of Blocked Drains
Blocked drains are a common nuisance in many households, and a host of culprits could be responsible. Hair strands, especially in bathroom drains, are perhaps the most frequent offenders. As they combine and tangle, they form clogs resilient against rinsing water pressure. Similarly, residues such as soap scum and body oils contribute to narrowing pipes’ surfaces, slowing, or even blocking, water passage. Kitchen drains aren't spared, either—grease from cooked food and stubborn food particles get trapped over time, setting the stage for a backed-up drain. Outdoors, decomposed leaves, loose debris, or invasive tree roots can compromise drainage systems.
Understanding these causes equips homeowners with frameworks to assess and address these challenges early. The severity of blockages might necessitate different approaches, ranging from basic removal to extensive inspection. Incorporating outdoor gutter checks, especially post-autumn shedding, prevents sediment buildup, and clearing indoor drains regularly ensures that an unblocked state is maintained. The first step always lies in identifying the specific source of blocked drain, thereby determining the next appropriate remedy.
Home Remedies and Tools for Unclogging Drains
Fortunately, for common blockages, a variety of home remedies and tools stand at your disposal, vital for restoring normalcy to draining systems. Simple yet effective, a plunger is often the go-to item for minimal blockages, creating pressure fluctuations that dislodge trapped material. For more stubborn clogs, especially further down the pipe, a plumber’s snake, or auger, comes into play. In the chemical realm, specialized drain cleaners break down grease and organic matter accumulated in pipes. However, it's worth noting that frequent chemical cleaner usage may lead to corrosive damage in pipes over time.
Alternatively, a more natural approach involves using ingredients right from your kitchen pantry. A combination of baking soda and vinegar, when poured down a stubborn drain, can act as a gentle yet effective solution. The chemical reaction helps break down buildup without harming your pipes. Pouring hot water afterwards ensures any broken residue is flushed away. While DIY solutions remain handy, don't hesitate to reach out to a professional for persistent issues. Combining these approaches ensures that you keep your drains functional and efficient.
Long-Term Prevention Strategies
To keep those pesky blockages at bay, implementing long-term preventive measures in your home is paramount. Starting with drain covers, these simple mesh or grid sieves prevent physical debris from entering pipes. Regular routine cleaning is equally effective—ensure that oily or greasy residues are wiped off kitchens and counters to prevent drain build-up over time. Importantly, correct waste disposal in your household is worth adoption. Avoid discarding oils or fibrous food waste down the drain but instead opt for appropriate disposal bins.
Communication with everyone in your household increases adherence to these routines, making sure clogs do not form at the hands of everyday habits. Dryer months heighten the necessity to monitor outdoor drainage systems against blockage possibilities from dust and fallen leaves. Regularly inspecting and cleaning gutters reinforces an unimpeded flow, managing unwanted water accumulation on rainy days. By keeping drains unclogged, you not only improve sanitation, but you also bolster the plumbing durability in your home for decades to come.
Identifying Common Internal Toilet Problems
When your toilet runs indefinitely, it's akin to a drain on both peace and resources. Understanding typical internal problems gives homeowners a clearer path toward rectification. The flapper valve is a frequent source of issues; designed to seal over the flush valve, it eliminates water escape into the bowl once the tank refills. A malfunctioning flapper—whether from wear or misalignment—results in constant water flow. On par with flapper issues, fill valves or float systems within some toilets tend to malfunction. When float arms are improperly adjusted, they may never signal the water to stop filling the tank.
Recognizing these symptoms is fundamental in addressing them effectively. A constantly running toilet can indicate either a flapper issue or low water causing overcompensation. Similarly, a weak flush could hint towards a fill valve that needs adjustment or replacement. With water conservation being a critical part of modern life, attending to these hiccups not only saves on water bills but also conserves precious resources. Effective issue identification ensures a sound strategy in subsequent fixes, restoring toilet function quickly and efficiently.
DIY Repair Techniques for Running Toilets
Fortunately, many running toilet problems can be fixed with straightforward DIY methods. Begin by removing the toilet tank lid to understand the mechanism within. Once you've identified an issue with the flapper, adjustment or replacement may be necessary. It's worth inspecting for mineral build-up or any impediments preventing the flapper from fully sealing. A standard sealant or a new flapper, both readily available in hardware stores, can resolve these issues swiftly. For fill valve related issues, you may need to adjust or replace the entire mechanism if adjustments don't suffice.
Ensure you're equipped with necessary tools like adjustable pliers, sealant, and possibly a replacement kit if component switch-outs are required. Carefully following a step-by-step realignment or replacement process mirrors professional tactics, ensuring job completion is efficient and effective. A thorough test post-repair is essential to confirm all components work harmoniously.
Routine Maintenance to Prevent Recurrence
Prevention remains vital in keeping running toilet annoyances at bay. Routine maintenance involves regular inspections for leaks, cleaning mineral build-up, and ensuring mechanisms within the tank operate smoothly. Periodically check the chain's slack between the flapper and trip lever, ensuring neither leniency nor tightness impede functionality. Likewise, maintaining an efficient toilet system goes beyond fixing; adjusting water levels, for instance, optimizes flush strength while conserving water.
Instigating bi-annual inspections and minor tune-ups secures long-term fidelity in toilet performance. Furthermore, promoting water conservation by transitioning to low-flush toilets complements functional stability while supporting environmental sustainability. Regular checks of entry valves and immediate response to any peculiar operations ensure less water wastage and more consistent toilet operation. Following these measures ensures that the hustle and bustle of life isn’t interrupted by plumbing disturbances.
Pinpointing the Causes of Low Water Pressure
Low water pressure is a common household woe that can affect everything from shower quality to dishwasher efficiency. Several issues can diminish water flow, such as clogged pipes—which often occur due to mineral deposits and sediment build-up. Faulty pressure regulators can also exacerbate water pressure problems by failing to maintain optimal pressure. Moreover, issues might arise from the main water supply—like a partially closed valve or damage in external pipes affecting delivery.
To properly diagnose this, you'll first need to measure the water pressure using a gauge, ensuring pressures range appropriately. Normal pressure typically measures between 40 and 60 PSI; anything below signals a pressure anomaly worth investigating. Locating the pressure issue often requires touching base with your local utility provider to rule out supply inconveniences.
Improving Water Pressure at Home
Thankfully, homeowners are equipped with several methods to restore water pressure to normal levels. Cleaning out faucet aerators is a straightforward action that can often improve immediate pressure issues—especially when mineral deposits have clogged the aperture. For persistent low pressure throughout the house, installing a pressure booster is an option worth considering. These devices enhance delivery efficiency across impacts users will deftly notice in their daily routines.
On a systemic level, considering a professional plumber to address or upgrade pipes mitigates extensive home-wide low-pressure scenarios. Additionally, your water pressure regulator may require adjustment—an easy operation for experienced DIY enthusiasts once you've located the regulator valve. Enhancing pressure correlates to accommodation of flowing volumes, making this both an efficiency exercise and comfort restoration maneuver. In California, where lifestyle demands and home comfort might vary, implementing these upgrades significantly enhances utilities and living experiences.
Preventative Care for Consistent Water Pressure
For householders aiming for consistent water pressure, preventative care becomes crucial. Routine inspection of supply lines and pipe infrastructure is encouraged to screen for build-ups or leaks that lead to pressure loss. Regular pressure checks every few months detect anomalies early, enabling prompt corrective action. It’s reflectively beneficial to coordinate routine plumber consultations, verifying all systems' alignment with optimum operating conditions.
Moreover, being mindful of lifestyle adjustments—such as spacing out water-heavy activities or usage during peak demand—supports a consistent water flow. Implementing efficient fixtures designed to maximize flow goes hand-in-hand with conserving water and maintaining consistent pressure. Coupling these insights with proactive assessments ensures homeowners maintain optimal plumbing systems, bolstering everyone's well-being significantly.
Common Issues with Water Heaters
Water heaters serve as indispensable household utility components, offering comfort and convenience beyond compare. Yet, they’re not immune to common problems. A prevalent issue includes insufficient hot water output, often at the expense of faulty thermostats, incorrect settings, or sediment accumulation at the tank's bottom. Another conspicuous defect relates to noisy tanks, potentially highlighting sediment-induced heating element stress or wearing fan belts in tankless systems. Leaks manifesting around the heater signify more advanced concerns like corrosion within tank systems.
Understanding these scenarios helps troubleshoot effectively and forecast issues before they develop into substantial problems. Different heater types—be it traditional tank-based or modern tankless—present distinct challenges and solutions. Water heating challenges often remain brand-specific, warranting owner manual familiarity alongside basic system knowledge to deduce operating issues.
Step-by-Step Troubleshooting Guide
Troubleshooting begins with the identification phase: assess whether your issue stems from thermostat mishaps, pilot light malfunctions, or sediment accumulations. Often, resetting the thermostat corrects minor irregularities in temperature output, while flushing the tank regularly prevents sediment buildup that would otherwise bog down efficiency. Leaks might necessitate more comprehensive checks, revealing fractures or extensive tank corrosion, requiring priority attention.
Addressing pilot light issues often require checking for debris or blockages obstructing the gas flow. A reassuring validation assures safe use, while encompassing broader appliance checks—such as inspecting thermostat settings and the reliable functioning of safety valves—brings foresightedness in maintenance efforts. Be sure to stick to recommended safety precautions throughout repairs to prevent accidents. Implementing these thorough methods and solutions equips households to tackle troubles without additional stress—only hot water should run consistently!
Maintenance Tips for Efficient Water Heater Operation
Effectual water heater operation aligns with systematic maintenance practices conducive to longevity and peak performance. Principally, ensuring your heater is flush drained periodically alleviates sediment accumulations—arguably the bane of heating systems. Draining approximately once a year removes sediments, preserves heating elements, and maintains output consistency. Likewise, professional inspections, ideally annually, confirm all components' synchronization and efficiency, flagging any emergent issues.
Moreover, attentively examining anode rods—a vital component preventing rust within tanks—prevents gradual corrosion and tank jeopardization. Periodic replacements, when necessary, drastically boost the appliance’s durability. For local homeowners, integrating these scheduled maintenance efforts reflects keen energy management, reducing costs while maintaining daily convenience across seasons. Overall, priority dedication toward heating systems underpins a comfortable and high-functioning living space throughout the year.
If You're Dealing with a Serious Plumbing Issue, Call Howdy Plumbing
If these plumbing challenges feel overwhelming, don't fret. Howdy Plumbing offers expert plumbing services tailored to local homeowners' needs. Whether you're tackling pesky leaky faucets or struggling with your water heater, our team is committed to providing you reliable solutions. Get in touch with us today to ensure your home’s plumbing is operating at peak performance. Embrace peace of mind knowing you're backed by exceptional service coverage—contact Howdy Plumbing now to schedule your consultation!
Call Howdy Plumbing now at (916) 546-7954 or send us a message online.